IPMS Hauptseite
Zurück
Deutsch
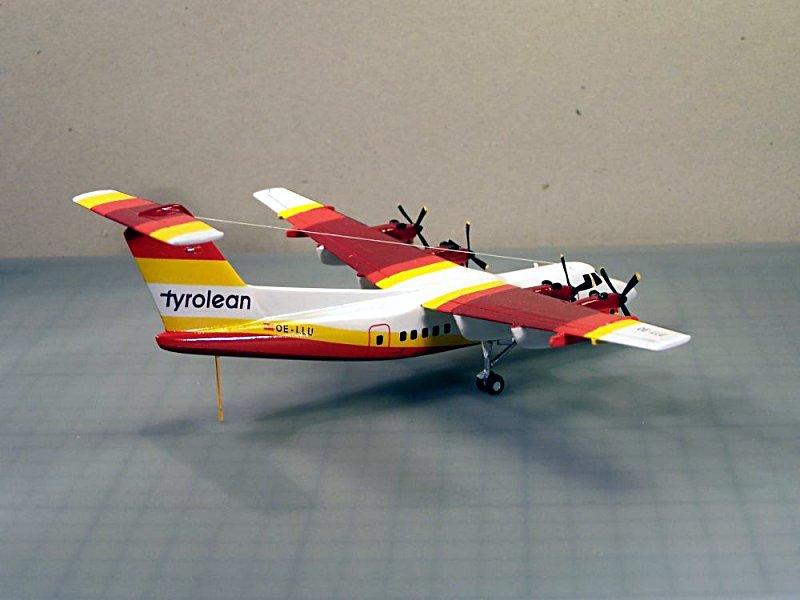
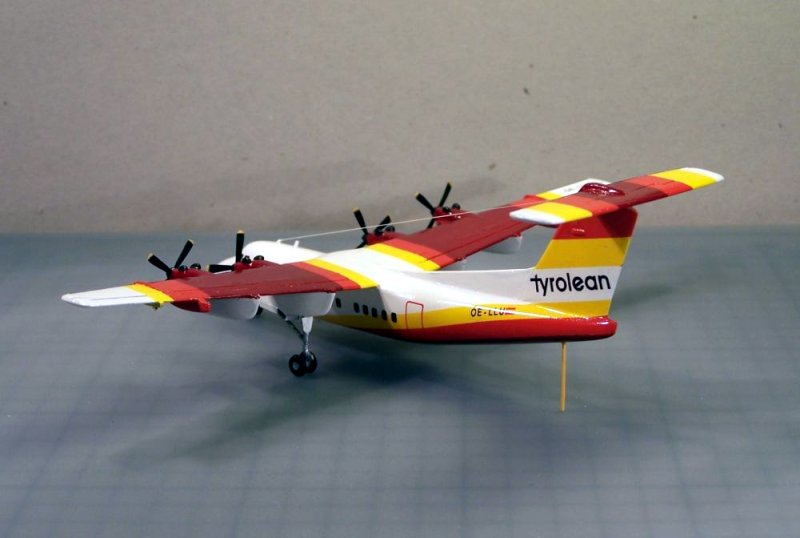
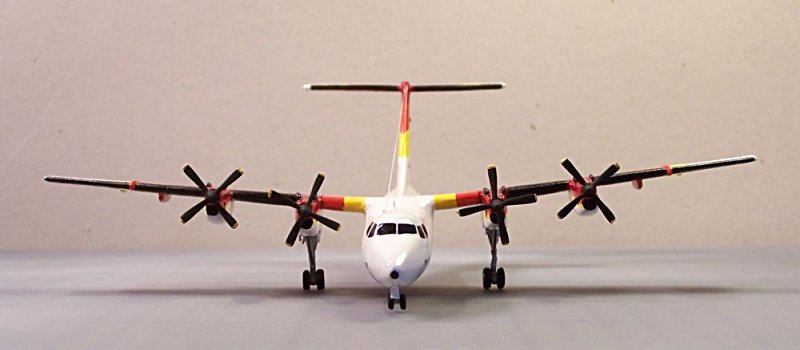
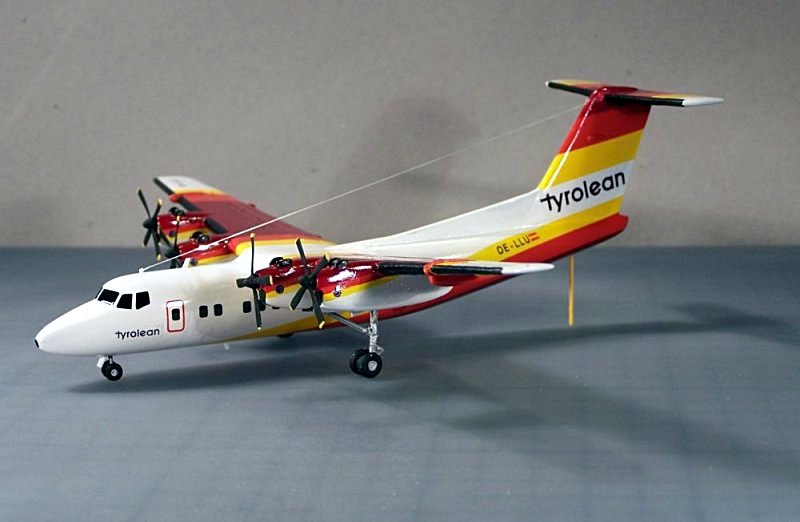
The Model
The fuselage was a solid resin piece, but it did not provide for any nose weight; consequently, the model, if not modified, would be a "tail sitter." I noticed this too late in the construction phase and had to resort to using a clear plastic rod at the rear of the fuselage as a stand to prevent "tail sitting."
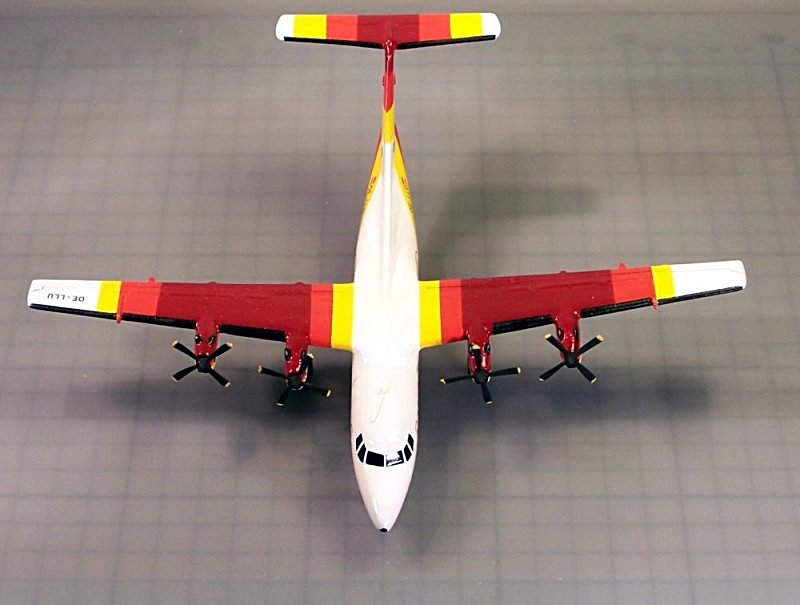
The wings are represented by a single, full-span resin piece. It includes well molded features such as wing fences, flap hinge lines, flap track fairings and the rear portions of the engine nacelles. The one-piece resin wing fit nicely into the recess on top of the fuselage.
Construction began with priming and sanding the entire model. The kit manufacturer had already painted the parts with a thick grey paint so any air bubble holes in the resin parts were easy to locate and fill. The only tricky areas were the engine nacelles.
The horizontal tail unit was a poorly formed plastic, injection-molded part that required a lot of filing and reshaping, including thinning the trailing edge of the elevator. The attachment point on the vertical fin also required work to allow the horizontal tail unit to seat properly.
After the parts were glued in place, I sanded the model before I primed it with Humbrol 01 paint. This paint adheres well to the resin parts and acts as a super base coat for the different colors that need to be sprayed for the airline livery. This is important because the Tyrolean Airways color scheme consists of bright colors that must be carefully masked with tape before being sprayed.
Painting the Color Scheme
Naturally, I had to re-sand the model after it was first primed. The priming works well to highlight air bubble holes in the resin that weren’t initially visible, despite being painted grey by the kit manufacturer. The grey primer genuinely helps in preparing the model for final painting. I sprayed the entire model with two coats of Revell 04-White paint after filling and sanding the air bubble holes in the resin parts. The white paint settled evenly and provided a good base for the multiple colors required for the Tyrolean Airways livery.
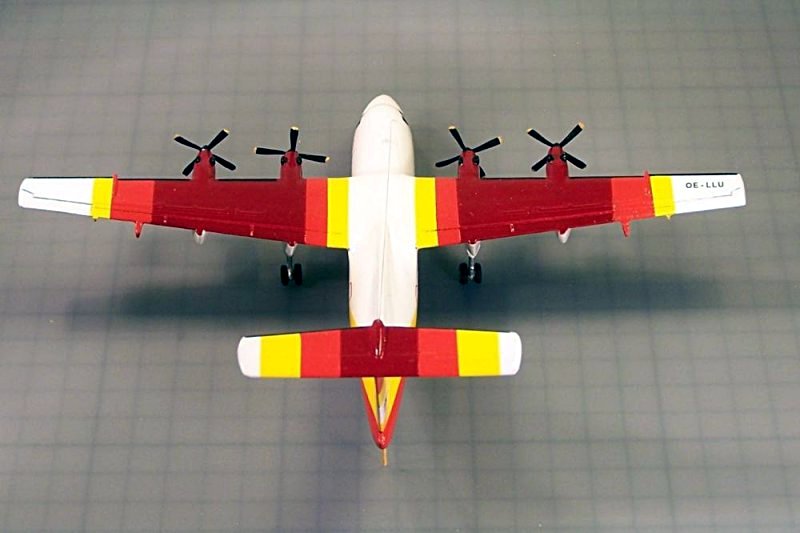
Initially, I studied all the available photos of Tyrolean Airways Dash 7’s using the photo search engine on the Airliners.net website (http://www.airliners.net) and even tried printing out a color photo for painting reference purposes. Unfortunately, there were no pictures showing either the upper or lower surfaces so I had to resort to guessing the layout and colors for the wings and horizontal tail surfaces.
Using a No. 2 soft pencil and a flexible ruler, I drew color demarcation lines on the fuselage and began to mask the color scheme with narrow strips of Tamiya brand masking tape. I began to think that this must be how the artist, Christo, must feel!? The narrow strips of Tamiya tape were used to outline larger areas that were to be painted and alternately masked. I masked the inner areas with thin, yellow sketch paper. This is an economical process—the cost of a sketch pad is only about 6 Euros (approximately US $8.40 in July 2009) and it will last for a lifetime of modeling. The primary advantage of using sketch paper rather than masking tape to mask large areas (other than the cost of Tamiya masking tape) is that it reduces the risk of lifting underlying layers of paint when you remove the masking material.
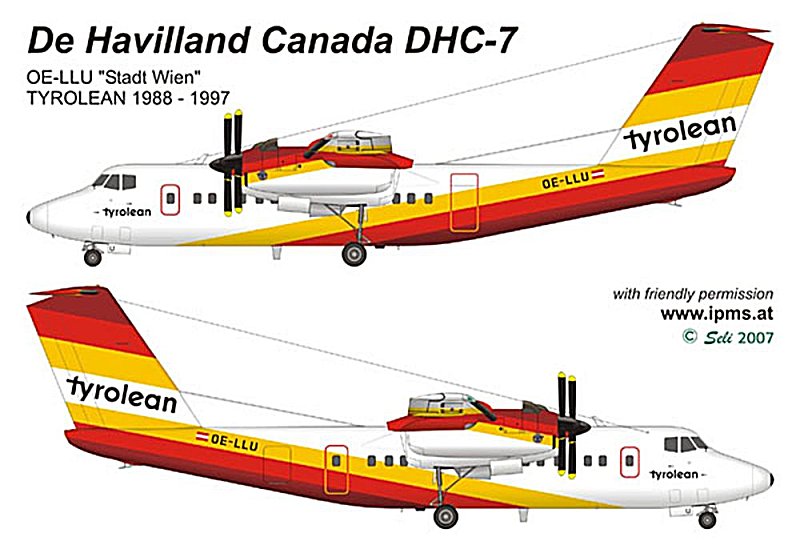
The yellow is Revell 310, lightened up with some Revell 04-White. The red is a 50:50 mixture of Revell 31-Red and Revell 30-Orange. The purple-red is Revell 331 that, on reflection, I should have darkened with a bit of black.
After the paint had dried, I coated all the surfaces with Kleer floor wax. I hand painted the Kleer by using a broad, flat brush. The end result was a beautiful, clear, gloss-coated surface.
Die Details
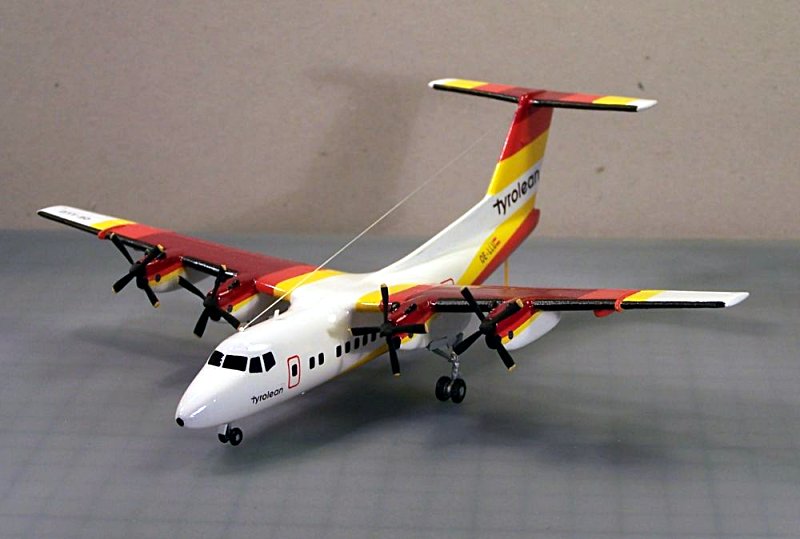
I considered the short-run injection molded landing gear and propellers to be simply useless and my scratch building skills to be inadequate. So, I began a search through my spare parts box for suitable replacements. The propellers came from Aero Club and are made of white metal. The propeller blades are easily bent into flight position. Unfortunately, I couldn’t find any suitable landing gear replacements in my spares box, so I had to scratch build them. It took quite a bit of adjusting until they fit properly. The landing gear doors and various antennae were cut from thin plastic sheet.
Die Decals
There are no decals for the Tyrolean Airways Dash 7. The color scheme was masked, as described above, and spray painted; the windows and doors came from a 1/144 scale Dash 7 detail sheet sold by Airline Hobby Supplies (http://www.airline-hobby.com ) and they were applied without any problems. After some research, I determined that the closest typeface for the original Tyrolean titles was "Avangard," so I used a personal computer ("PC") to design the titles and registration letters and printed them onto ink jet decal paper. This was not an easy process, but eventually I got an acceptable set of titles and registrations. I sprayed "Marabu" brand fixative to seal the decals to the decal paper before applying them to the model.
Zusammenfassung
Not everyone has a colorful DeHavilland Dash 7 on their shelf. When I got the kit and saw what it looked like in the box, I didn’t think it would ever be beautifully finished and on my model shelf. During construction, I often thought that the model would end up in the garbage bin. It would have been easy to stop building such an old resin kit, but I wouldn’t want to have to explain that to anyone. Once again I persevered and finished a difficult model. Was it worth it in the end? Yes, it was worth the effort. And now I have another resin airplane kit on my work bench waiting to be built. I must be crazy!
Enjoy building!
Uwe Damaschek, Berlin (August 2007)