Hi, I'm Jorge Roberto Wolf and live in Brazil. I am 46 and a space engineer ... and a modeller. I like to create and develop methods when I build my kits. Since I like to add details and build items from scratch. I have a special pleasure in discovering and developing new methods to achieve a specific goal. As the saying goes: "there is not a difficult task in plastic modelling; if it becomes hard, it's because the wrong way had been chosen"
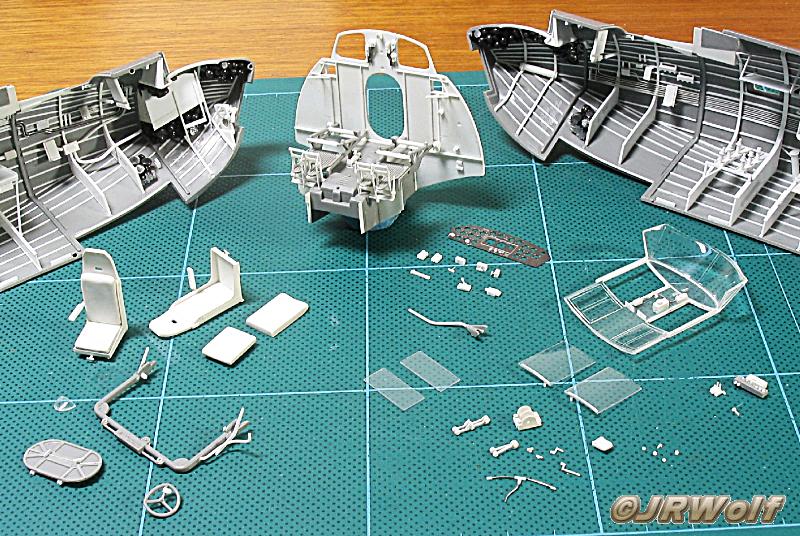
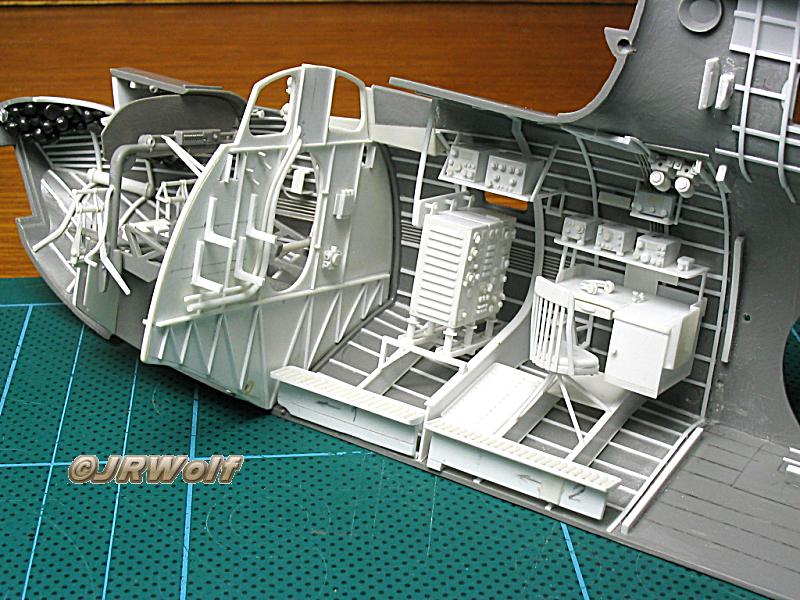
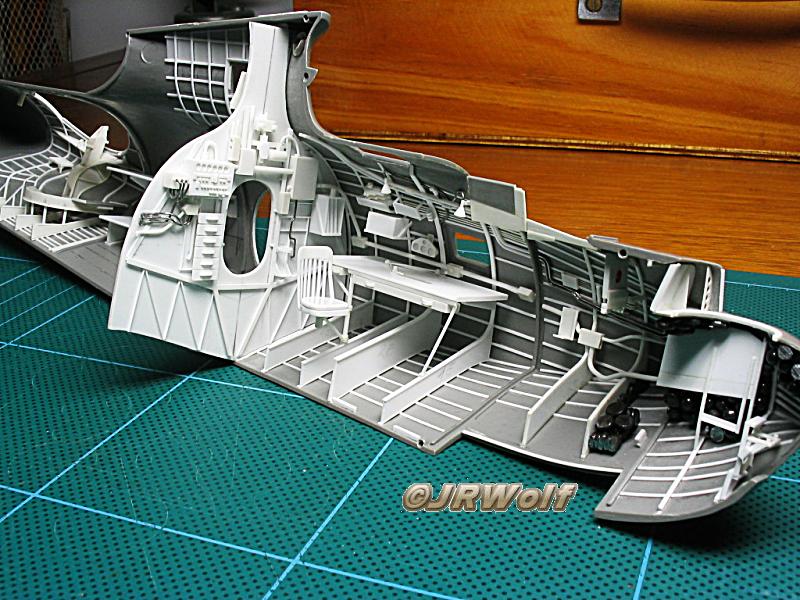
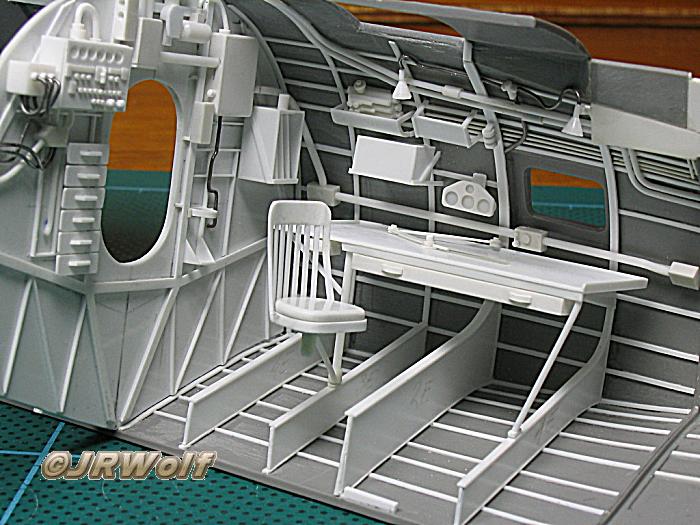
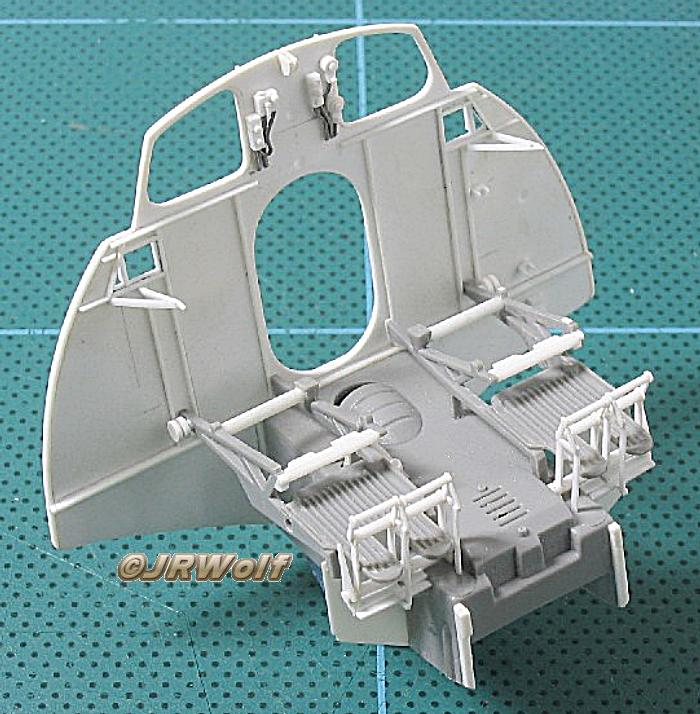
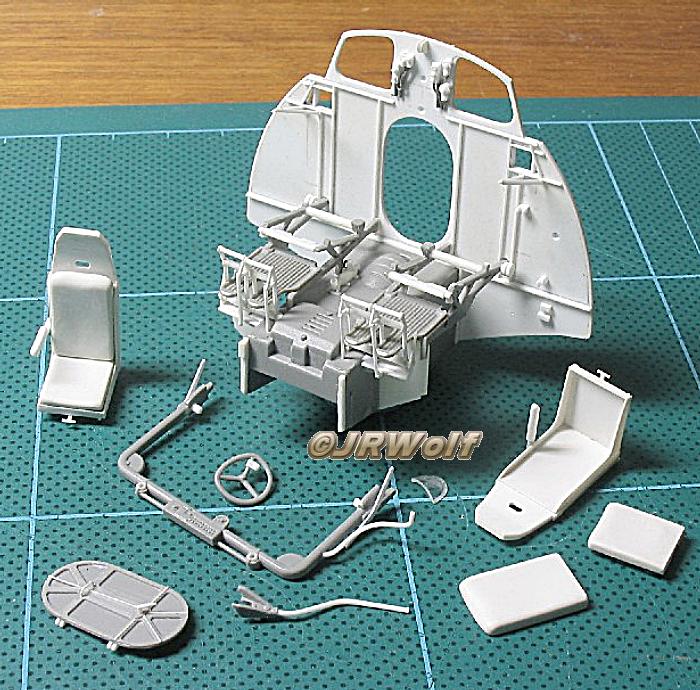
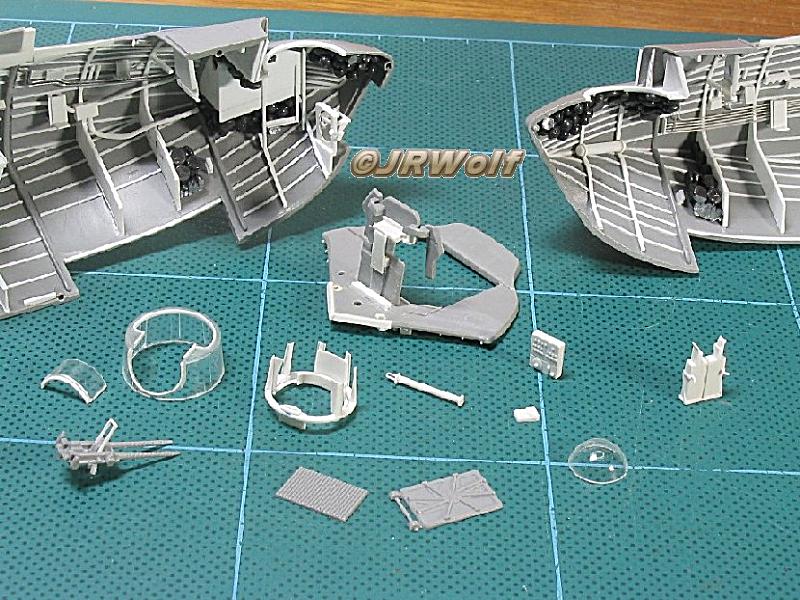
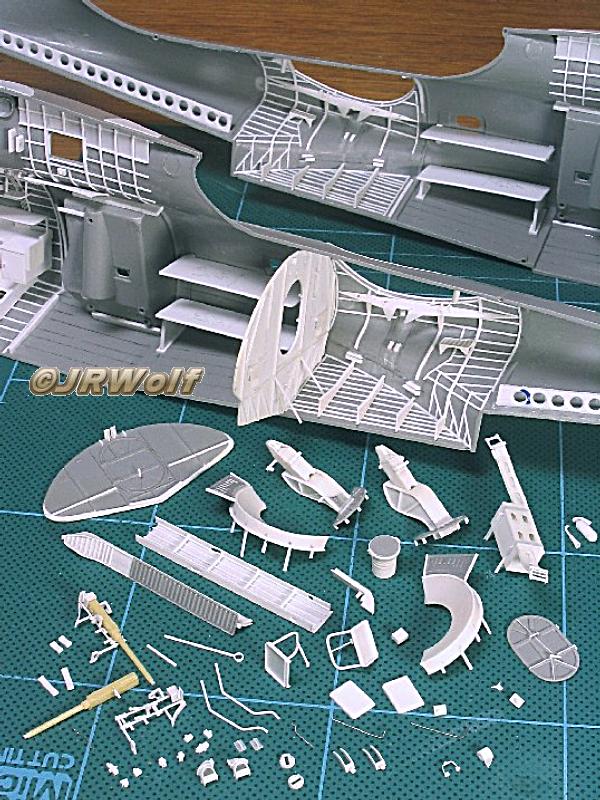
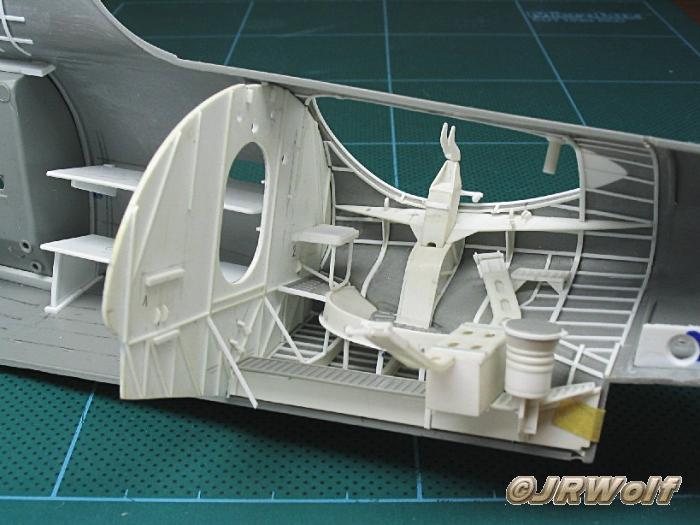
Here are some pictures of my recent work, still in progress. It is a Pro-Modeler 1/48 PBY-5A Catalina. I began this project in March 2003 and at least its interior is already painted. The pictures show them before painting.
The inspiration for this project came when I took second place in a local IPMS contest; a friend won the first place with a superdetailed 1/48 Tamiya Wildcat. It was literally crammed with aftermarket resin sets, was very well done and he really deserved that first place, because also the paint job was excellent..
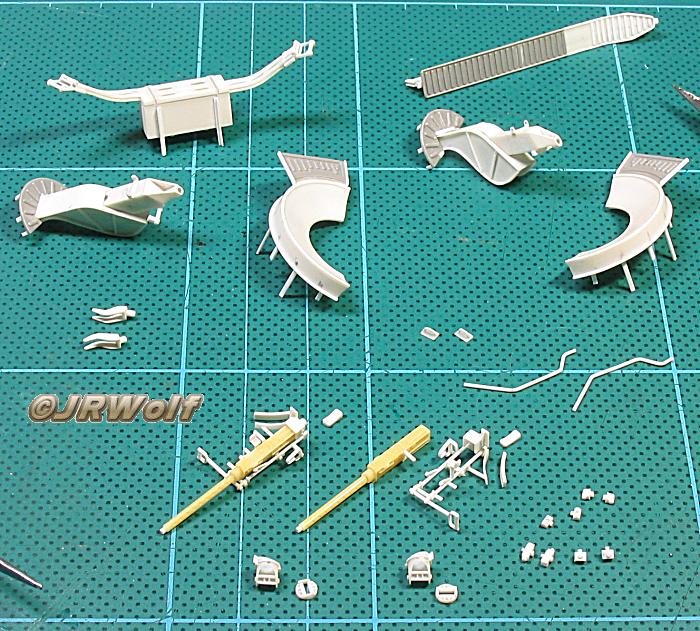
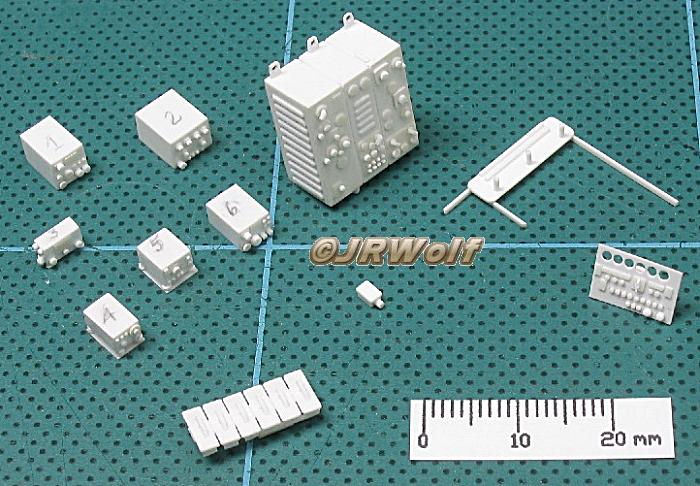
So I decided to build a kit without using any commercially available detail sets. All detailing being entirely built in plastic, from scratch! The only aftermarket parts used were two Paragon 1/48 .50 machine guns... And here it is, almost finished.
At first, when I begin a project like this, I collect info material (handbooks drawings, photos,...) It then is fundamental to draw some sketches of the items to be scratchbuilt. With these sketches it is much easier to estimate the correct proportions of the items involved in the process, by comparing their proportions with pictures and reference manuals.
Many years ago, I drew sketches on paper, pencil & rubber style, in a larger scale than the kit parts (2:1 or even 5:1). Now, I use AutoCad, a specific program for drawing. Therefore it had been much easier to work with, since it is possible to insert the reference picture itself (that I had scanned before), draw over it, reduce the sketch to the proper scale, and then print it to use as a guide..

Tools
There's nothing extraordinary, just things like scissors, tweezers, modelling knives, sanding sticks, sand paper, files, glues and so on ... plus my Dremel tool with its accessories. The only not so common tool is my punch & die set. One of my most important tools is a sliding calliper too, where I can check the dimensions of the plastic sheets, which I cut to scratchbuild parts. However, what perhaps may be the difference are some techniques. For instance, I rarely use soft putty (like Tamiya or green putty stuff), in its place I use cyanoacrylate glue.
Glue
I once used cellulose thinner to glue small parts, but its smell is too strong. Nowadays I use trichloroethylene. This is applied with a very small brush (size 00), and it does not melt the plastic; even those of smaller dimensions. If too much is applied or spilled, you must leave things as they are, because this fluid is highly volatile. It is not a strong weld, but it fits perfectly the job of gluing delicate parts. For a stronger weld, I use Tenax 7R. By now I am trying Testors liquid glue to get strong welding, since it has been somewhat difficult to find the former here in Brazil.
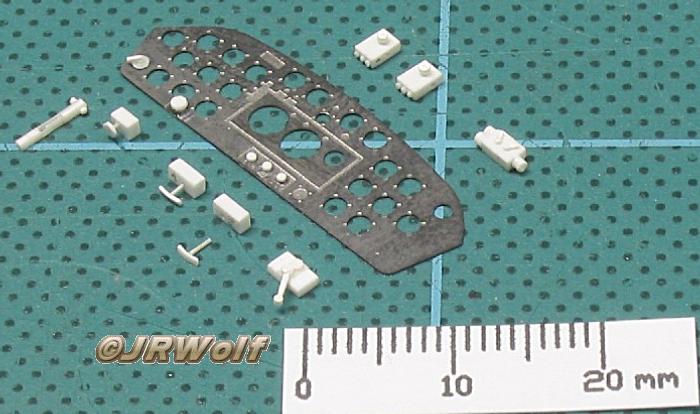
Small Disks and Knobs
The punch & die set is one of my most important tools when scratbuilding. It is somewhat expensive, but it is worth every cent, in my opinion. I use the Reheat set (unfortunately no longer available), because it covers a much wider range, when comparing with all others. But I use it only for cutting discs and buttons. For opening holes, I still prefer a drill, since I found them much easier to align several holes in line than the punch & die set.
Cutting plastic sheet
I believe that the way I use my tools and the method of construction may make some difference, but I am really not sure about that. To my knowledge, I work like everyone! There may be some differences in style, however.
For instance, I use at the same time four modelling knives. There's one for the very hard work (I'll call it #4), like scraping mould seams and flash in injected plastic parts. This one does need to be almost blind. The very extremity of its blade must be broken too (it will break under normal use, by the way)!
The next knife (#3) is used to cut plastic sheet, where I score two or three lines over the plastic (0.25 mm thick, for example) with the aid of a rule. This one is sharper than #4, but not too much. I use this one almost all the time, and like the former, its extremity is also broken. Both #4 and #3 must be used with some finger pressure.
The next (#2) is an almost new blade, and is used when the sharpness of the edge of the blade is necessary. The last, the #1, is always a virgin blade, required to cut very soft and thin materials, like decal films. Both #2 and #1 blades are perfectly pointed. Needless to say, #2 and #1 are used with great care.
I always cut plastic over a modelling mat, where the knife is scored with a rule in a lateral motion. The rule is used for lengths larger than the blade length; otherwise I use #3 (sometimes #2) to cut the plastic with a vertical motion of the blade.
The plastic sheets that compose the parts I build are never cut in their final dimensions before they are joined together. In fact, this is done only for the first plastic sheet part of the ensemble; and I always let the final dimension (a length, for example) of the remaining parts to be defined only after joined to the previous one. With this method, you always ensure good mating dimensions for all sheet parts that compose that ensemble.
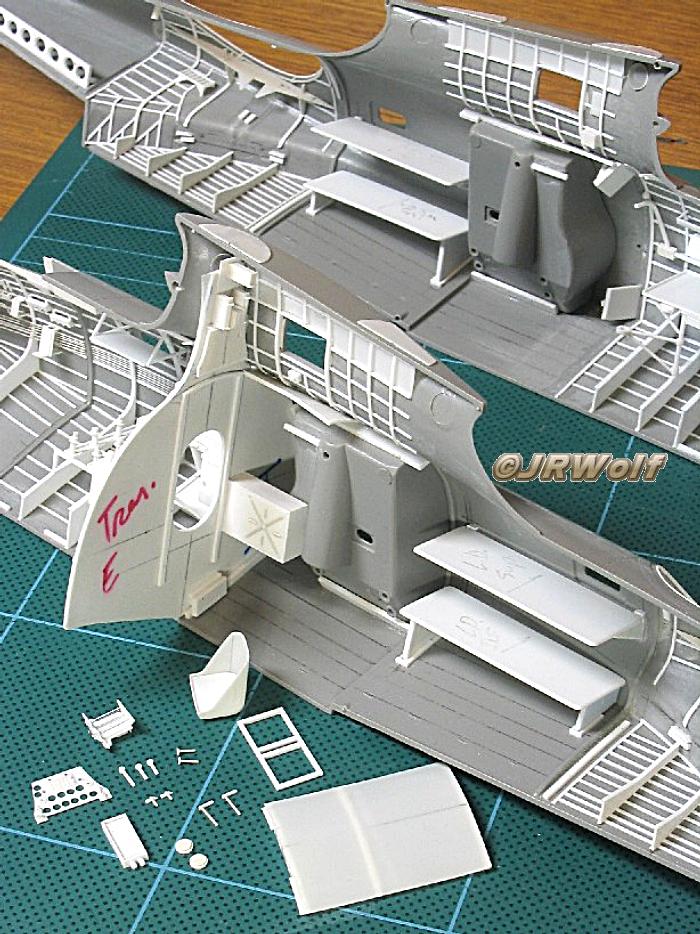
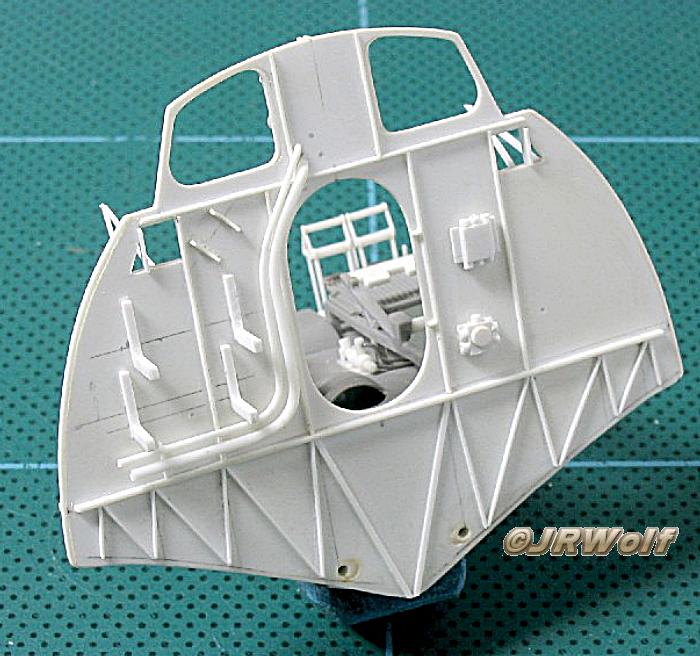
Creating bulkheads is a three stages procedure. First, I draw a line inside the fuselage that will be a guide for the proposed bulkhead. Its perpendicularity is then checked. Then, I usually place two thin strips of electrical insulating tape, spaced apart with the thickness of the future bulkhead. Second, I place several small lengths of scrap plastic, each one roughly with the shape of the bulkhead in the region they are placed. Each one is progressively joined with other similar plastic scraps, creating a chain-like ensemble. Both steps are repeated for each fuselage half individually (since the interior of plastic parts is rarely symmetrical).

After each shape has thoroughly dried, they are joined together to check the fit. Third, the joined shapes will be used as a guide to build the final bulkhead. I usually scan it, insert the image in an AutoCad program, draw over it, and print it on paper. The paper is glued (with white glue) over a plastic sheet with the appropriate thickness, and will be used as a template to determine the areas where the plastic has to be removed. Thus it is possible to achieve bulkheads that will later fit almost perfectly!
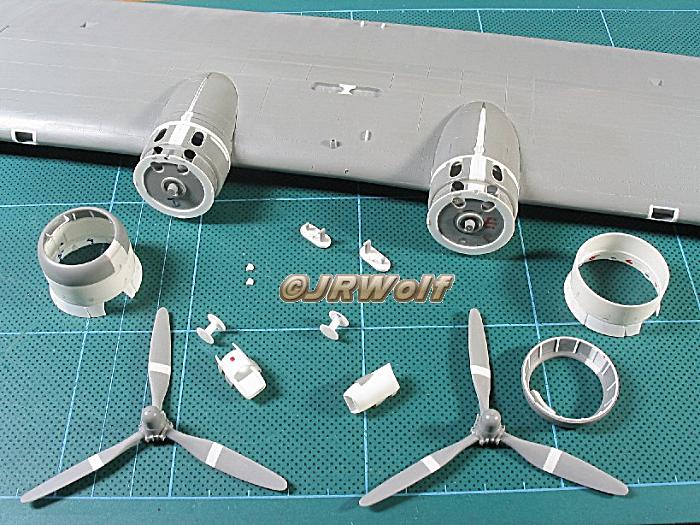
Other than detailing its interior, I modified the cowlings, since those from the kit are too small (the outside diameter is smaller than the diameter of the real engine scaled down!). Furthermore I thinned the wings at the tips (and the wingtip floats too).
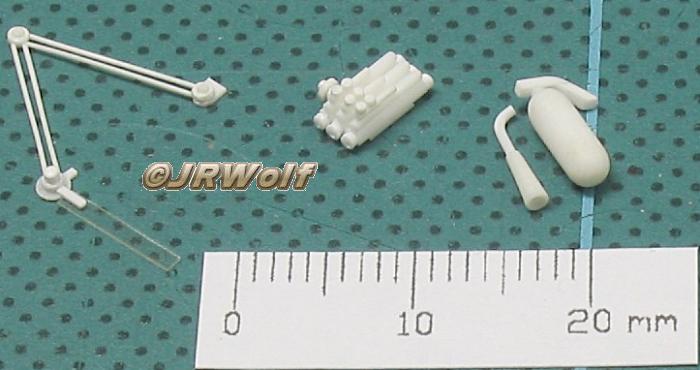
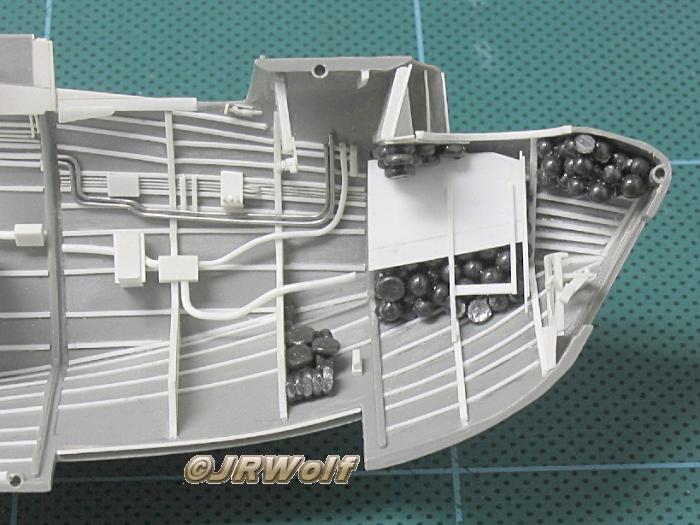
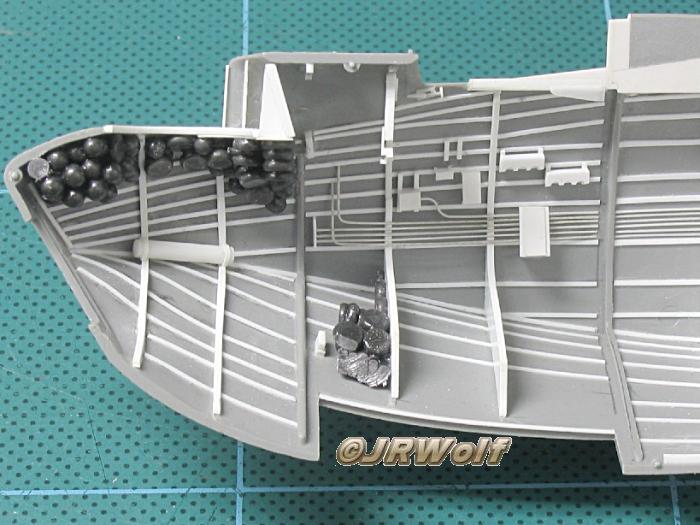
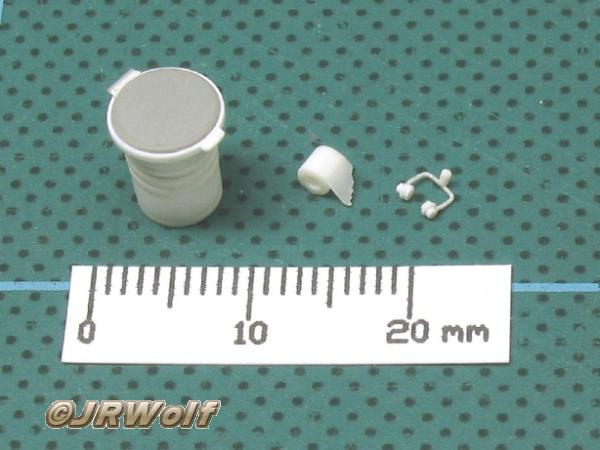
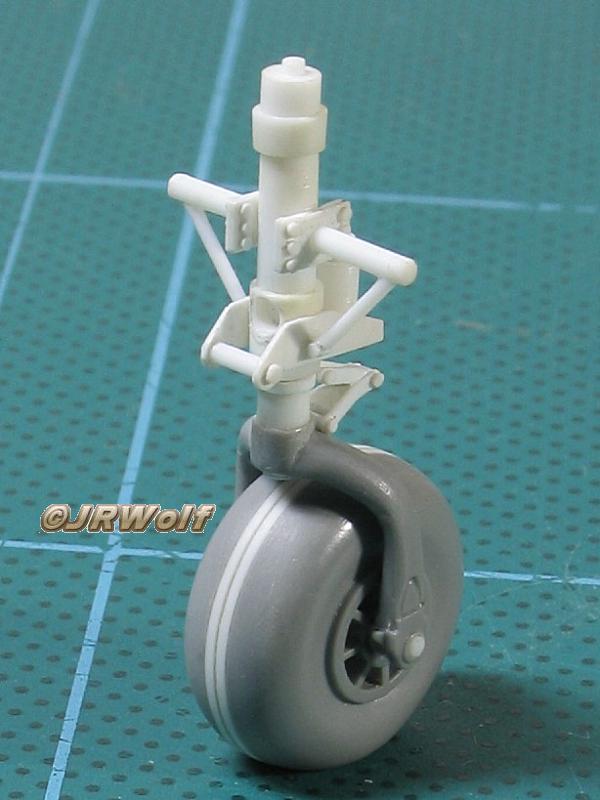
I also had to modify the tail, since it was too large (the base of the rudder on the kit was almost 10 mm too large at its base!). Originally I purchased the Belcher Bits conversion, but its surface is finished in a different way than the kit: there are no rivets, just engraved panel lines! Since the kit is crammed with them, one has three choices: engrave rivets on the resin parts (a boring task), fill all the kit rivets (a really boring task), or live with them together. Well, I chose neither! In fact I decided to correct the kit by myself. No, this was not a masochist decision, but I had to save weight in the tail in order to add the minimum amount of lead in the nose and cockpit (remember, there was almost no space available, since I detailed all its interior) Therefore I added lead under the seats, under its cushions, under the catwalks; even inside the nose wheel and the scratchbuilt water flasks! I believe that it will no longer be a tail sitter!

My camera is a Canon Powershot A70, with 3.2 megapixels. The lighting comes from a standard desk light with two 15W fluorescent lamps. Sometimes I use a white cardboard to create a counter light. I always place the camera over a tripod and set it with F8 aperture, no flash, ISO speed 50, no exposure compensation (0), macro mode and evaluative light metering. I always shot with a shutter release delay of 2 or 10 seconds.
Further pictures and comments are in Catalina Part 2
and Catalina Part 3
Text & Photos Jorge Roberto Wolf, Brazil (jrwolf000@yahoo.com.br )